How to Turn On Grid Lines in the Samsung Camera
Turn on grid lines in the Samsung camera: the Composition guide path on One UI 7 to 9, Grid lines on older phones, the level, and fixes if it's missing.
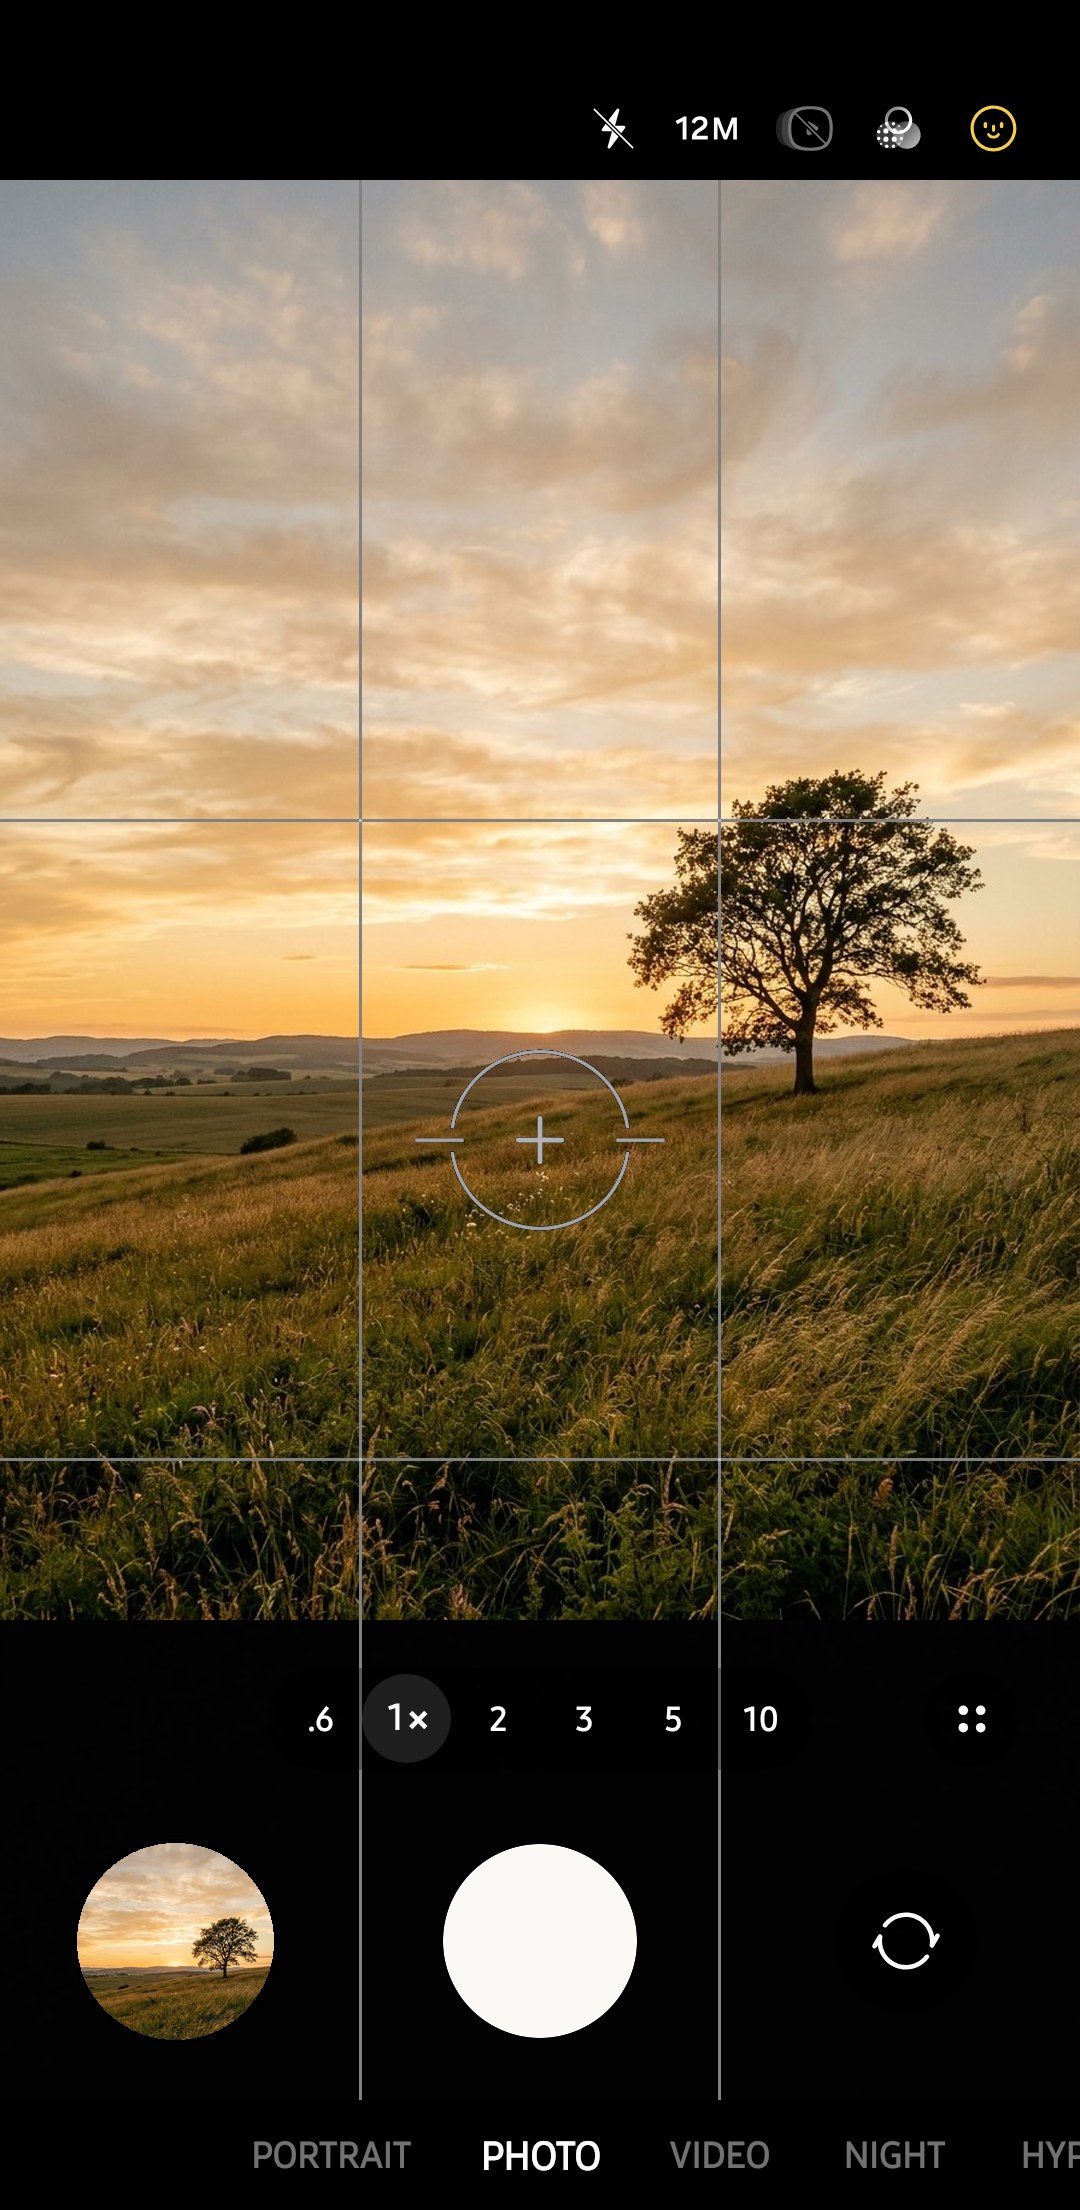
The grid feature is tucked away under Camera settings and isn’t always called Grid lines. On Samsung’s newer Galaxy phones (those running One UI 7 and above), you’ll find Composition guide instead of Grid lines. Turning on Composition guide will allow you to show grid lines and/or a level indicator when looking through the camera viewfinder.

Turn on grid lines on One UI 7, 8 and 9
On a Galaxy S25 Ultra with One UI 9 (checked in November 2026), the following steps are accurate and in line with what Samsung’s website says for One UI 7 and newer.
These steps also work on other Samsung Galaxy phones that run One UI 7 or newer, but depending on the model (particularly more budget-oriented ones), you may find fewer options surrounding the switch.
- 1
Open Camera settings
Open Camera and tap Quick controls (the button with four dots next to the zoom controls), then tap the gear icon at the start of the Quick controls panel to open Camera settings.
- 2
Find Composition guide
Under General, tap Composition guide (located below Tracking auto focus and above Location tags). If this feature is already enabled on your phone, you’ll see which option you’ve selected here.
- 3
Switch it on and choose what to show
Slide the top switch to On and select Grid lines and level, Grid lines only or Level only (choose Grid lines and level if you’re not sure which to pick, since this provides both aids).
- 4
Go back to the preview
Exit Camera settings and you should see the composition guide on your preview image in Photo mode (there’s also a level indicator in the centre if you’ve chosen this option). Samsung notes that you can use this feature to help you frame photos or videos.


Where the switch is on older phones and the A series
Depending on your phone’s model and the version of software it’s running, the toggle may be called Grid lines or Composition guide.
As per Samsung’s India support page (updated in September 2026), to switch on grid lines on Samsung phones running One UI 7 or above, go to Camera settings > Composition guide and pick one of the available options.
On Samsung phones running older versions of One UI, head to Camera settings > Grid lines and switch it on.
Samsung’s official guide to turning on the grid lines feature on the Galaxy A16, A26, A36 and A56 phones (via the company’s US website) still mentions the Grid lines toggle under the General section.
| Software | How to open Camera settings | Name of the switch |
|---|---|---|
| One UI 9 | Quick controls (four dots), then the gear | Composition guide, with three options |
| One UI 7, 8 and 8.5 | Quick controls (four dots), then the gear | Composition guide |
| One UI 6 and older | Gear icon in the row at the top of the viewfinder | Grid lines (on or off) |
| Galaxy A16, A26, A36 and A56 (Samsung US guide) | Camera settings, General section | Grid lines |
As for when grid and level were introduced together, Samsung’s camera team said in 2025 that grid and level can be used together or separately, when it introduced the One UI 7 camera on Samsung Members.
According to Samsung, Galaxy S22 series, Galaxy S23 series, Galaxy S24 series, Galaxy S23 FE, Galaxy S24 FE, Galaxy Z Fold4, Galaxy Z Flip4, Galaxy Z Fold5, Galaxy Z Flip5, Galaxy Z Fold6 and Galaxy Z Flip6 would get the new grid and level together feature via software update. Galaxy S25 series and Galaxy S26 series come with the feature out of the box.
If your phone shows neither name, you can check if there’s a pending One UI update on your Samsung Galaxy phone and check again after updating. Also, Samsung’s UAE website says the same thing.
Grid lines, level or both
| Option | What you see | Good for |
|---|---|---|
| Grid lines and level | A 3x3 grid plus the level mark in the centre | Everyday shooting and learning to frame |
| Grid lines only | The 3x3 grid on its own | Busy scenes where the centre mark gets in the way, such as street photos |
| Level only | The level mark with no grid | Keeping the camera straight for interiors, documents and video |
For example, say you take a close portrait where the level lands on someone’s face, or there’s a small subject that’s centred, and the level will be dead in the middle of the preview in this case. You can switch this back and forth between shots, for instance using Grid lines only for centred subjects and reverting back to Grid lines and level for wider scenes such as landscapes. Whichever you choose will remain in place until you change it or reset your camera settings.
All of these options use a grid that consists of two horizontal and two vertical lines. There’s no more detailed grid available or an option for a golden ratio overlay on a Galaxy S25 Ultra with One UI 9, with Samsung owners calling for a golden ratio grid option on the company’s community forum as recently as late 2025. Our golden ratio guide explains how to work with that shape without an overlay.
How to read the grid and the level
The intersections of the four lines are good places to position the main subject. A horizon should be along the top or bottom line, and the sides of buildings and doorways should be parallel to the vertical lines. Our rule of thirds guide covers where to place different subjects on that grid.
The circular icon with a cross inside and two lines either side is the level. Samsung’s Korean camera team calls this a horizontal and vertical level and says it helps you take steady photos. It’s useful for photos of rooms or of tables (looking down) where there is no horizon to check against. Align your phone before taking the shot, as although it may only look slightly tilted on your phone, it will be more obvious when displayed on a larger screen.
These are just guides in the viewfinder. They won’t appear on your final video or photos. They’re safe to leave on all the time, with nothing to remove later on!
What grid lines are good for

- When taking landscape photos, try to align the horizon (for example, the line between the sea and the sky) with one of the horizontal lines. It’s difficult to recognise whether the horizon is tilted on the small display, and cropping the photo to correct the tilt later means that parts of the edges will be removed.
- Try to align the vertical lines of doors or windows, for example, with the vertical grid lines. This can be helpful when taking photos in interiors or of buildings. Check the alignment both horizontally and vertically before taking the photo. If you tip your phone up, the walls seem to lean inwards, as our architecture photography guide explains.
- You can use the centre box as a reference when taking photos of reflections or of long corridors to make sure that the main subject is positioned centrally in the picture. The symmetry guide has more on centred framing.
- According to Samsung’s support pages for the Galaxy S25 and Galaxy S26, the grid can also be used as a reference when recording videos. Keep a speaker's eyes near the upper line and use the level to keep walking shots straight, and see the video recording tips for settings.
- Keep the phone level for a straighter panorama (and less cropping needed at the top/bottom). See our panorama guide for further details.
Shot suggestions and the grid
Samsung's website for the US describes Shot suggestions (found under Intelligent features in Camera settings) as "on-screen guides" to assist with aligning a picture, and Samsung's camera will then choose the framing it thinks is best based on what it detects. It can be used in tandem with Composition guide (which provides its own framing reference), but treat Shot suggestions' recommendations as an added opinion only, as it may not necessarily agree with your own intended framing.
You can also correct a skewed picture after the fact, but be aware that rotation results in some amount of cropping on all sides, so it's still best to try and get it straight when you shoot. Open it in Gallery and tap the pencil, then straighten it before you crop, as our photo editor guide shows.
Grid lines not showing
If the grid is missing, it usually means that the grid setting has been switched off or reset. Check the following points in sequence.
| What you see | Likely reason | What to do |
|---|---|---|
| No Grid lines item in Camera settings | One UI 7 renamed it | Open Composition guide under General |
| The level shows but no grid | Level only is selected | Choose Grid lines and level or Grid lines only |
| The grid vanished after a camera fix | Reset settings or Clear data restored the defaults | Turn Composition guide on again |
| Neither name appears | Older software or a model without the option | Update the phone, then restart the Camera app |
Note that resetting settings or clearing the Camera app’s data will reset all camera settings (not just the grid) to their defaults. Our Camera failed guide explains both steps. After clearing data or resetting settings, double-check other settings that you may have changed (such as resolution and volume key shortcut), since these will also be reset to their defaults.
How do I turn on grid lines on my Samsung camera?+
Do grid lines appear in my photos?+
Why use grid lines on a camera?+
Can I change the grid to a golden ratio or 4x4 grid?+
How do I turn off the grid lines?+
Keep reading

How to Turn Off the Shutter Sound on a Samsung Galaxy
Open Camera settings and switch off Shutter sound. No switch on your Galaxy (UK and EU phones)? Mute the System volume. Korean and Japanese ones can't.

Samsung Leading Lines Photography: Lenses, Angles, Fixes
Why some leading lines fall flat and how to fix them on a Galaxy, with the lens, height and grid settings for roads, rails, stairs and shorelines.

Samsung Architecture Photography: Straight Lines and Light
Fix leaning buildings, bent edges and glass reflections in Galaxy architecture photos, with settings by situation, the right lens and perspective edits.

Samsung Pro Mode Presets: Settings to Save by Situation
How to save and load Samsung Pro mode presets in Camera Assistant, with starting values for night streets, tripods, action, portraits and the moon.