Samsung White Balance: How to Get Accurate Colors Every Time
How to set white balance manually on a Samsung Galaxy, with Kelvin values for common light and fixes for orange indoor photos and blue shade.
Colours will be more consistent if you manually set the white balance (it takes about ten seconds in Pro mode). White balance informs the camera of the colour of the light so it can compensate accordingly. Under lights with a strong colour (orange indoors, blue in the shade, etc.), Auto white balance often gets this wrong.

What is white balance on a Samsung camera?

White balance is used by cameras to make white things look white. Light can have different colours, which are represented by temperature in Kelvin (K). 2700K (typical household light bulb) is considered to be warm light and will appear orange in photos. Cool light (think of being outdoors in the shade or on an overcast day) can be as high as 6500K-7500K and will appear blue in photos. When you set the white balance in Kelvin in Pro mode, you’re telling your phone what colour temperature light you’re shooting in and it will adjust colours accordingly. AWB (auto white balance) will do this for you. However, it can get confused (tungsten light, coloured walls, etc.). It is fine in most daylight situations but can also change between frames of the same scene. By setting it yourself you avoid these problems and it will remain the same until you change it. Our Christmas lights guide uses a fixed value to keep warm bulbs golden.
How do I change white balance on a Samsung phone?

Manual white balance lives in Pro mode. White balance can be adjusted in the Camera app’s Pro mode (available under More). Tap WB to either choose a preset (Samsung’s guide lists Daylight, Cloudy, Tungsten, etc.) or adjust the white balance manually using the table below as a rough guide to different colour temperatures (measured in Kelvin). Colour tone, available on some Galaxy phones (Samsung shows it as being available alongside ISO and white balance adjustment in Pro mode on some of its recent A series handsets), is handy for adjusting the colour of your images, for example reducing a green cast. On older versions of Pro mode it included a tint adjustment. Take a test image of a white object and view it in Gallery, adjusting the colour temperature in 200K increments until the image looks correct. If your image looks a little orange then reduce the setting. If it looks a little blue then increase the setting. Remember you’ll need to check this each time the lighting changes as the setting you use will remain until you alter it.
| Light source | Starting Kelvin | Closest preset | What to watch |
|---|---|---|---|
| Household bulbs and lamps | 2700 to 3200K | Tungsten | An orange cast means the value is too high |
| Fluorescent tubes and office lighting | 4000 to 4500K | Kelvin slider | A green tint that the Kelvin slider can't remove |
| Direct sunlight | 5200 to 5600K | Daylight | Usually close to what Auto picks |
| Cloud and open shade | 6500 to 7500K | Cloudy | A blue cast means the value is too low |
| Sunset and golden hour | 3500 to 4500K | Kelvin slider | Full correction removes the warmth you came for |
| Warm restaurant bulbs | 3200K, then 2900 to 3600K | Tungsten | Adjust in 200K steps against a white napkin |
- 1
Open Pro mode
In the Camera app's mode bar, tap More and then Pro.
- 2
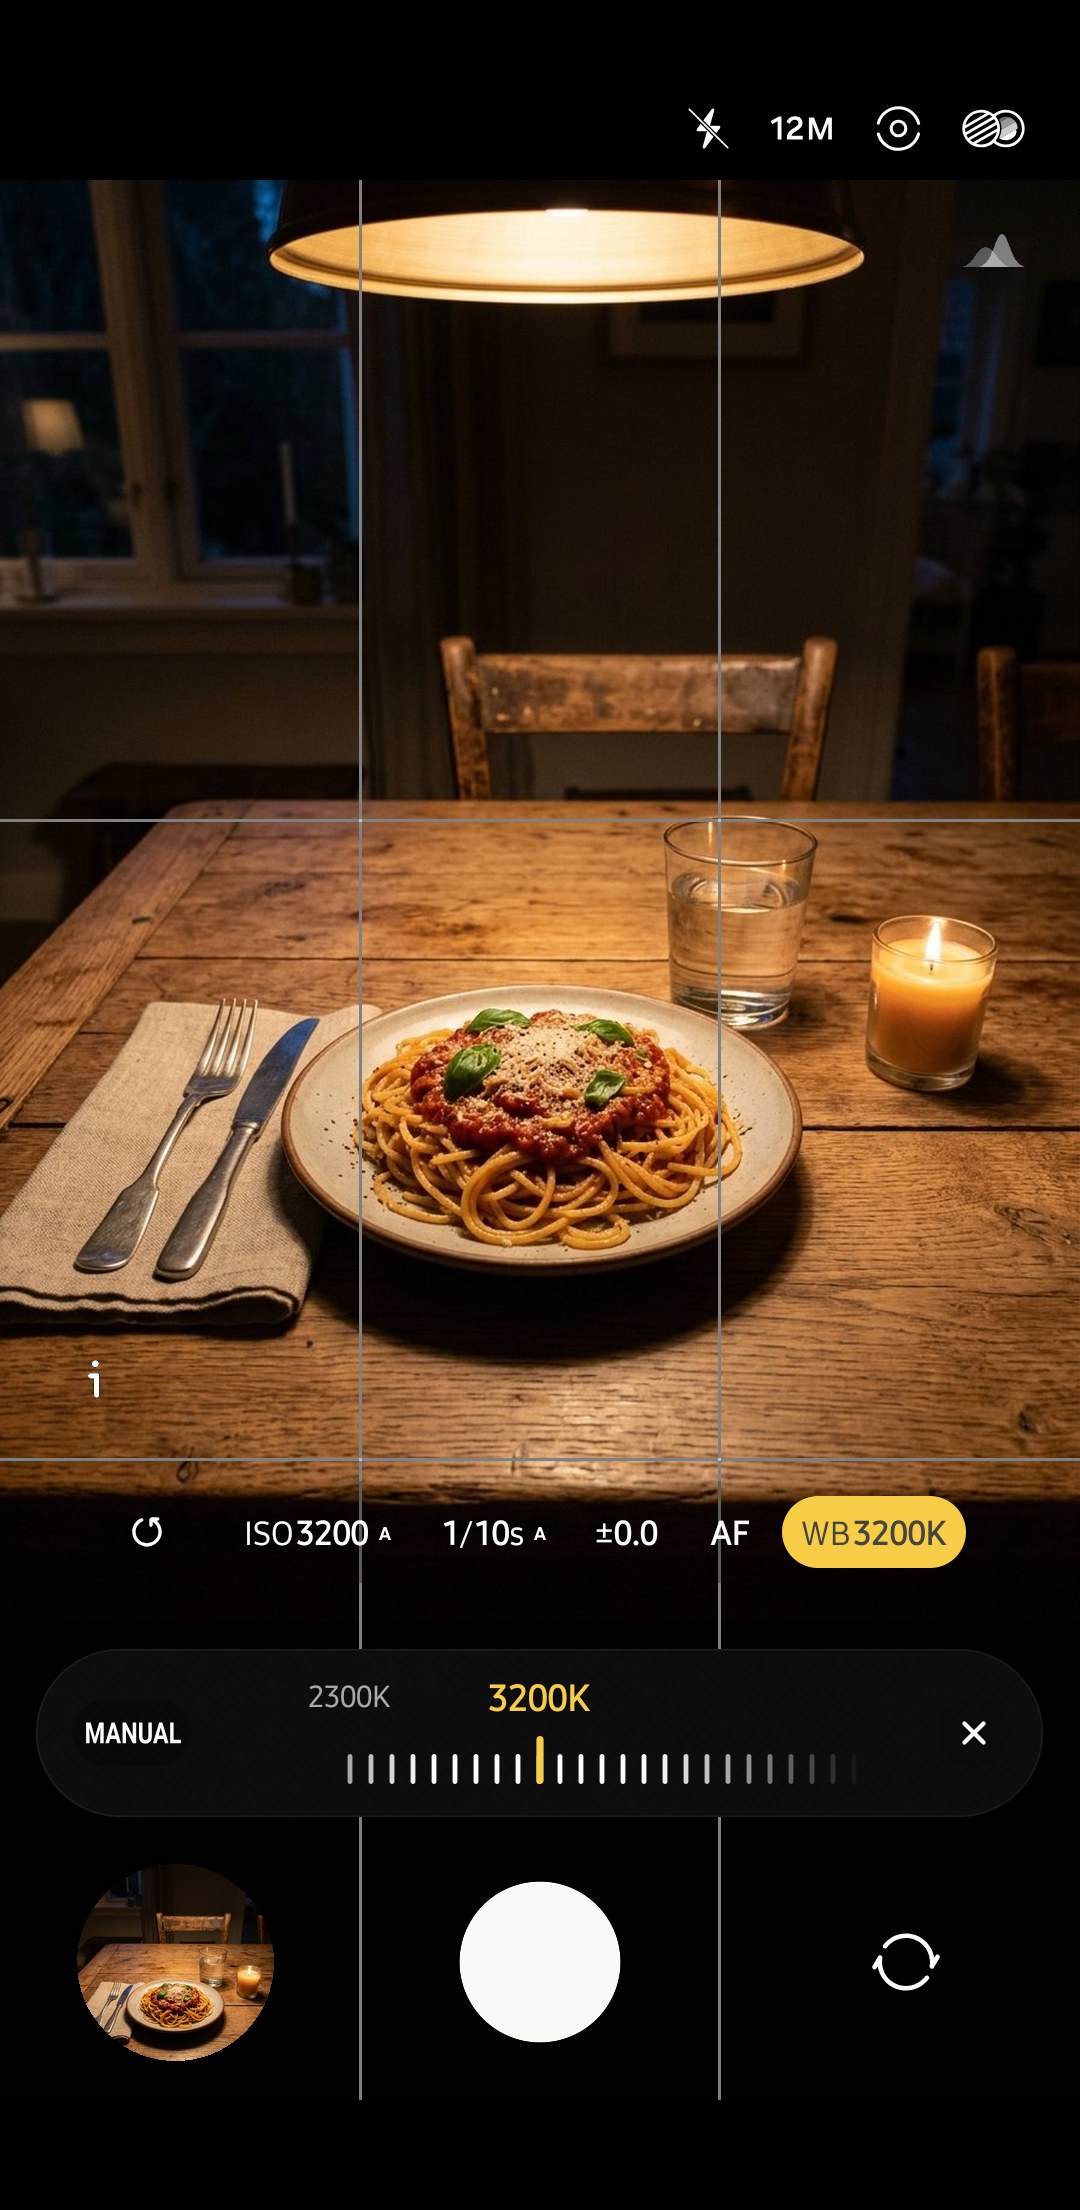
Tap WB
In Pro, tap WB and switch from Auto to either the preset options or the Kelvin slider.
- 3
Set the value
Use the chart above to help you determine which setting best matches your lighting conditions.
- 4
Check something white
Take a picture of something white. Check it out in Gallery and adjust WB up or down in 200K increments until the white appears more neutral.

Lock white balance across a series

Locking white balance can also make your life easier when it comes to editing. Say you’re photographing a series of product images, or shooting all the courses of a meal. If you’ve used Auto white balance, the colour cast of each shot could well be slightly different, even though the lighting conditions have remained the same. This inconsistency is distracting and means you have to edit each image separately to try and achieve consistency. However, if you lock WB at the start of the shoot, all the images will have the same starting point, so you can tweak one in Lightroom and then apply the same settings to the others, saving you a lot of time. Locking WB is also important if you’re shooting a series of portraits – skin tones that vary from shot to shot stand out. If you’ve ever watched a videographer setting up a shot you’ll have noticed they always set their WB before hitting record. There’s a good reason for this! Frames in a still life set are coherent with one another, owing to this same habit.
Fixing white balance in RAW
When colour accuracy is crucial, try shooting in Pro mode using RAW (DNG) format (on recent flagships this can be enabled to shoot RAW alongside JPEG; on One UI 9 and the S26 series this is found in Camera settings, Photo format, Pro mode picture format; on One UI 7 it’s in Advanced picture options). This will give you far more latitude to get the white balance spot on as opposed to trying to make significant corrections to a JPEG (which can result in weird skin tones and whites). On top of that, Samsung's Expert RAW app goes one step further and records not only a JPEG, but also a 16-bit Linear DNG with a wider dynamic range than conventional RAW files, which makes it the better choice for product shots. Import the DNG into an app such as Lightroom mobile and use the white balance pipette to select a neutral area to get things as balanced as possible. The RAW vs JPEG guide covers the trade-offs in file size and editing time.
What white balance should I use for restaurant food photos?
Restaurant lighting is notoriously difficult for cameras to work out a suitable white balance for, so this is a great scenario to give it a try! If you’re not sure where to start, a good ballpark figure for warm restaurant bulbs is 3200K, so open up Pro mode and set the WB to this. Take a test shot with a white napkin in the frame and see how it looks on the playback screen. If it’s too orange, try 2900K; if it’s too blue, try 3600K, adjusting in 200K increments until it looks right. Set ISO 400 and a shutter speed of 1/125s, as this should give you enough latitude for the lighting conditions in a restaurant and the shutter speed should be fast enough to use at arm’s length without getting blur from camera shake. Leave these settings as they are for the duration of the meal and your pictures should be consistent from one course to the next. The trick here is to decide which light source you want to set the white balance for. If your plate of food is mostly under the bulbs, set WB for them, as you can only ever be correct for one source of light!
The best way to check WB is with a neutral grey card, but this isn’t practical at the dinner table, so the next best thing is a white napkin. The food photography guide covers light and angles for the plate itself.
Common white balance problems and fixes
- Mixed lighting is a real issue too, but this can be solved in-camera: make sure your subject is fully within one of the light sources (daylight from the window in this case), or turn off the other (lamps). Half the photo in daylight and half in lamp light will always give you a colour cast no matter what WB you choose.
- Some artificial light sources (fluorescent lighting, some LED bulbs etc.) can result in a green/magenta cast, especially noticeable on skin tones. These cannot be corrected with the Kelvin slider, as it only moves along the blue/amber axis. However, Lightroom’s tint slider (towards magenta) can correct for this. Some versions of Pro mode also have a ‘colour tone’ slider for this purpose.
- Sometimes you may not actually want to remove a colour cast: candlelight, sunsets etc. are meant to look warm/yellowish so correcting to get rid of that will make it look flat and remove the mood/atmosphere you were trying to convey. In these situations you can set the WB to something like 4500K to retain some of the warmth.
- Even when set manually, your WB setting can change: switching camera modes, or even just an accidental swipe, can change this without you realising, so it’s worth double checking this setting, especially as some versions of One UI will remember Pro mode settings and others won’t!
Why do my indoor photos look orange on my Samsung?+
Can I fix white balance after taking the photo?+
Should I use Auto white balance or manual?+
Keep reading

Samsung Black and White Photography: Settings and Editing
Black and white on a Samsung Galaxy: the mono camera filters, Portrait mode's mono effects, Pro mode settings, and converting in Gallery or Snapseed.

Samsung Camera Blurry? Every Cause and How to Fix It
Why Galaxy photos come out blurry and how to fix each cause, from dirty lenses and missed focus to motion, low light, close-focus limits and faults.

30-Day Photography Challenge: Get Your Samsung Galaxy Off Auto
A free 30 day photography challenge for Samsung Galaxy phones that takes one camera decision off Auto each day, with starting settings and a printable PDF.

Samsung Panorama Mode: How to Get Clean, Level Panoramas
How to use Panorama mode on a Galaxy phone, why panoramas warp or ghost and how to fix it, plus vertical panoramas, lens choice and viewing in Gallery.